Qualdo - DRX Installation Steps:
How To Deploy:
Deploying Qualdo-DRX is accomplished by using a CloudFormation Template that will install the necessary infrastructure components as well as the required roles and permissions. This section will help you fill out and run the CloudFormation Template.
Step 1 - Quick Create Stack and Specify the Parameters:
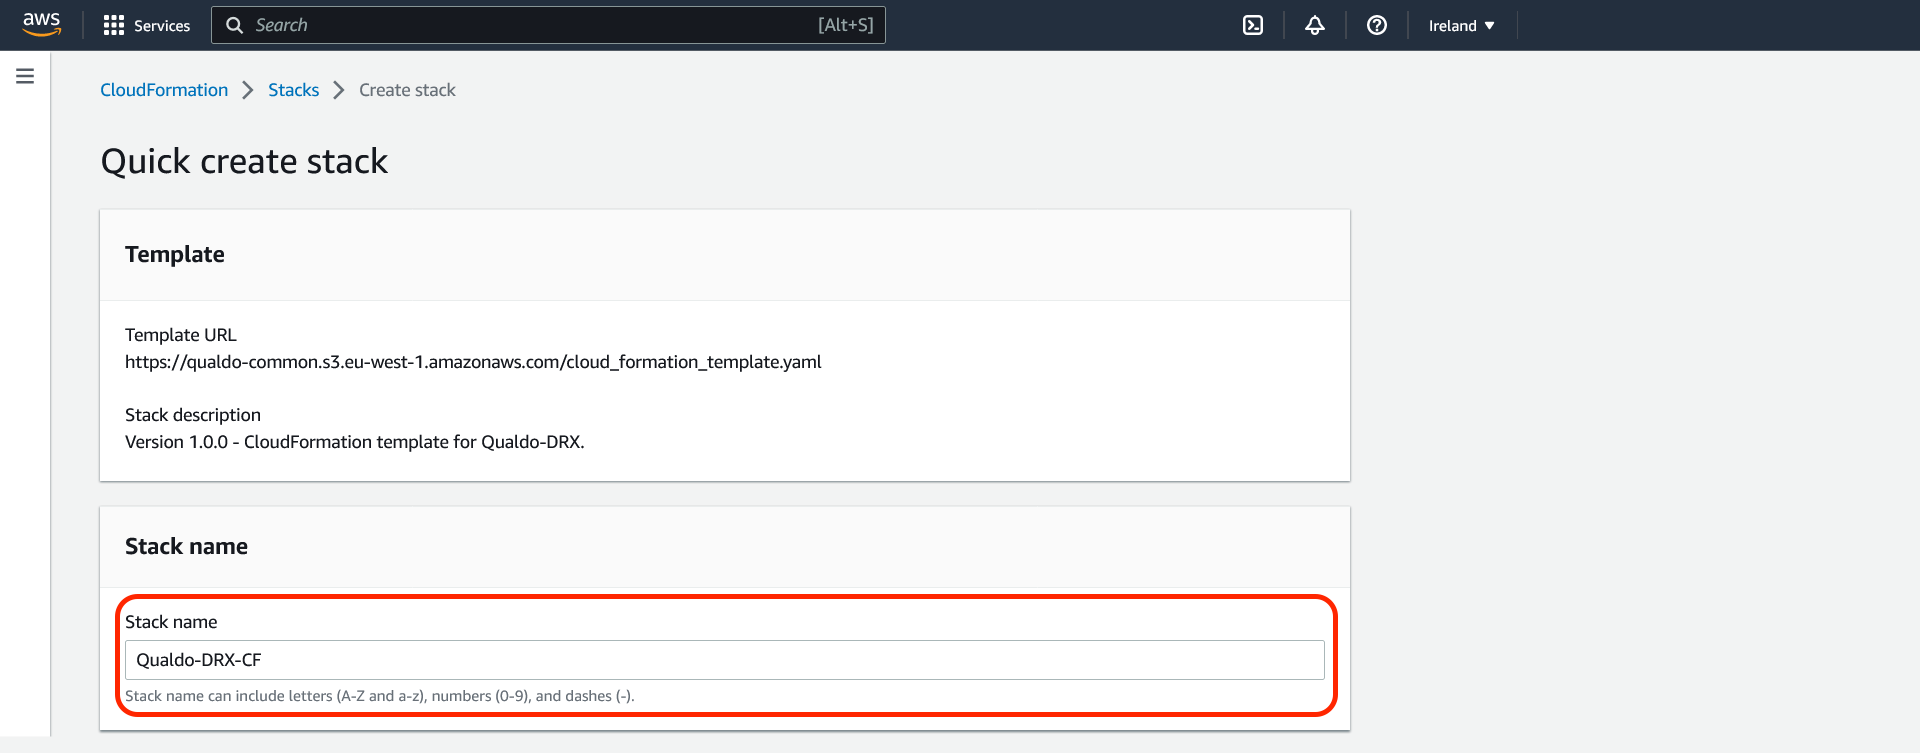
Stack Name
This is an optional field.
The default stack name is Qualdo-DRX-CF. You can specify a different stack name as shown below.
Authentication
-
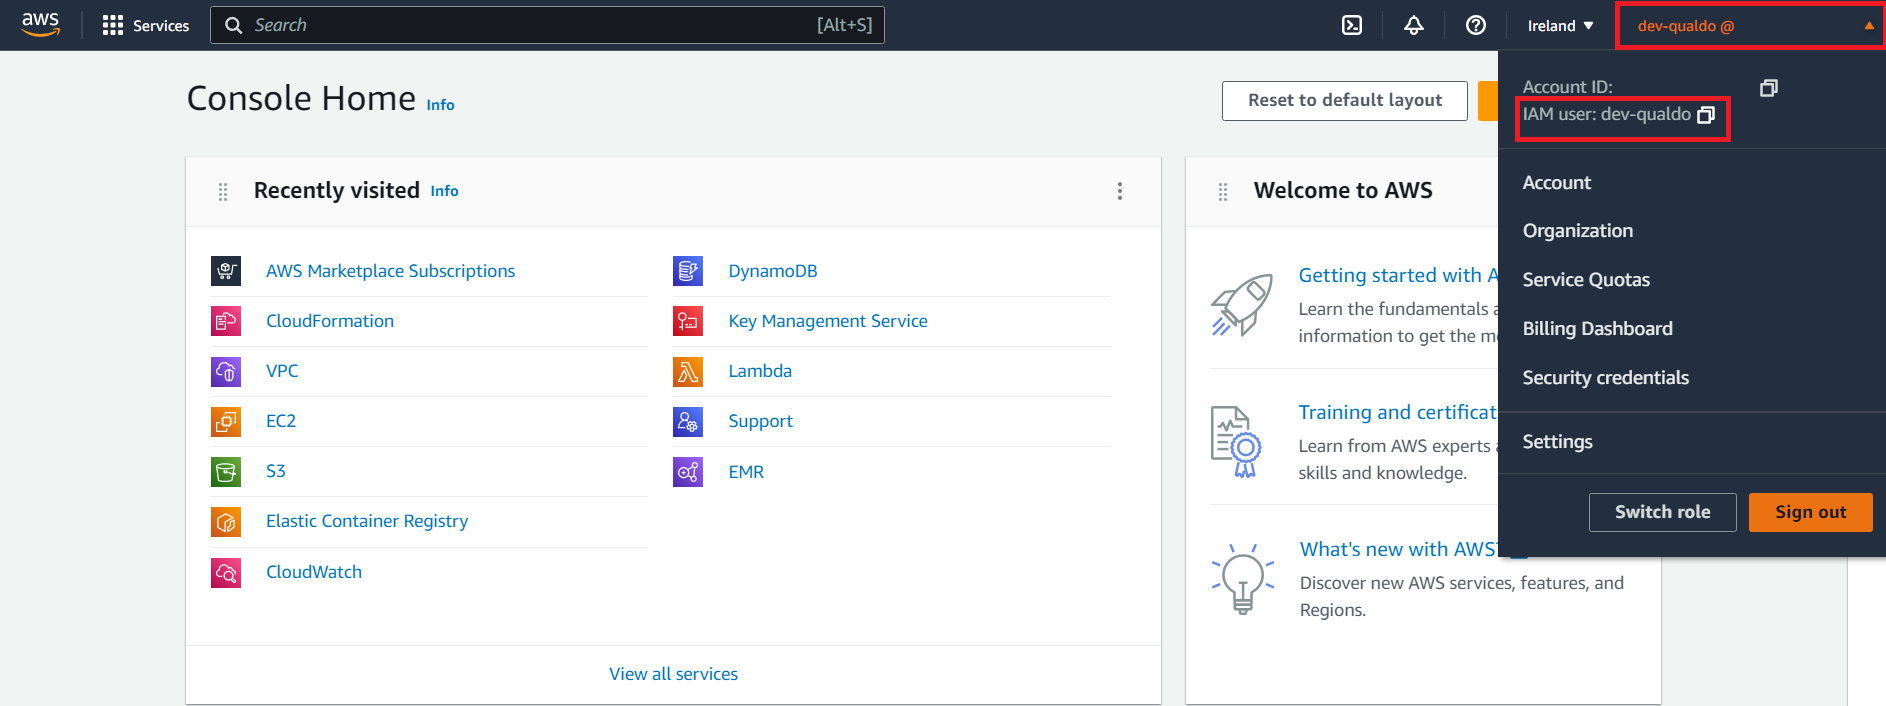
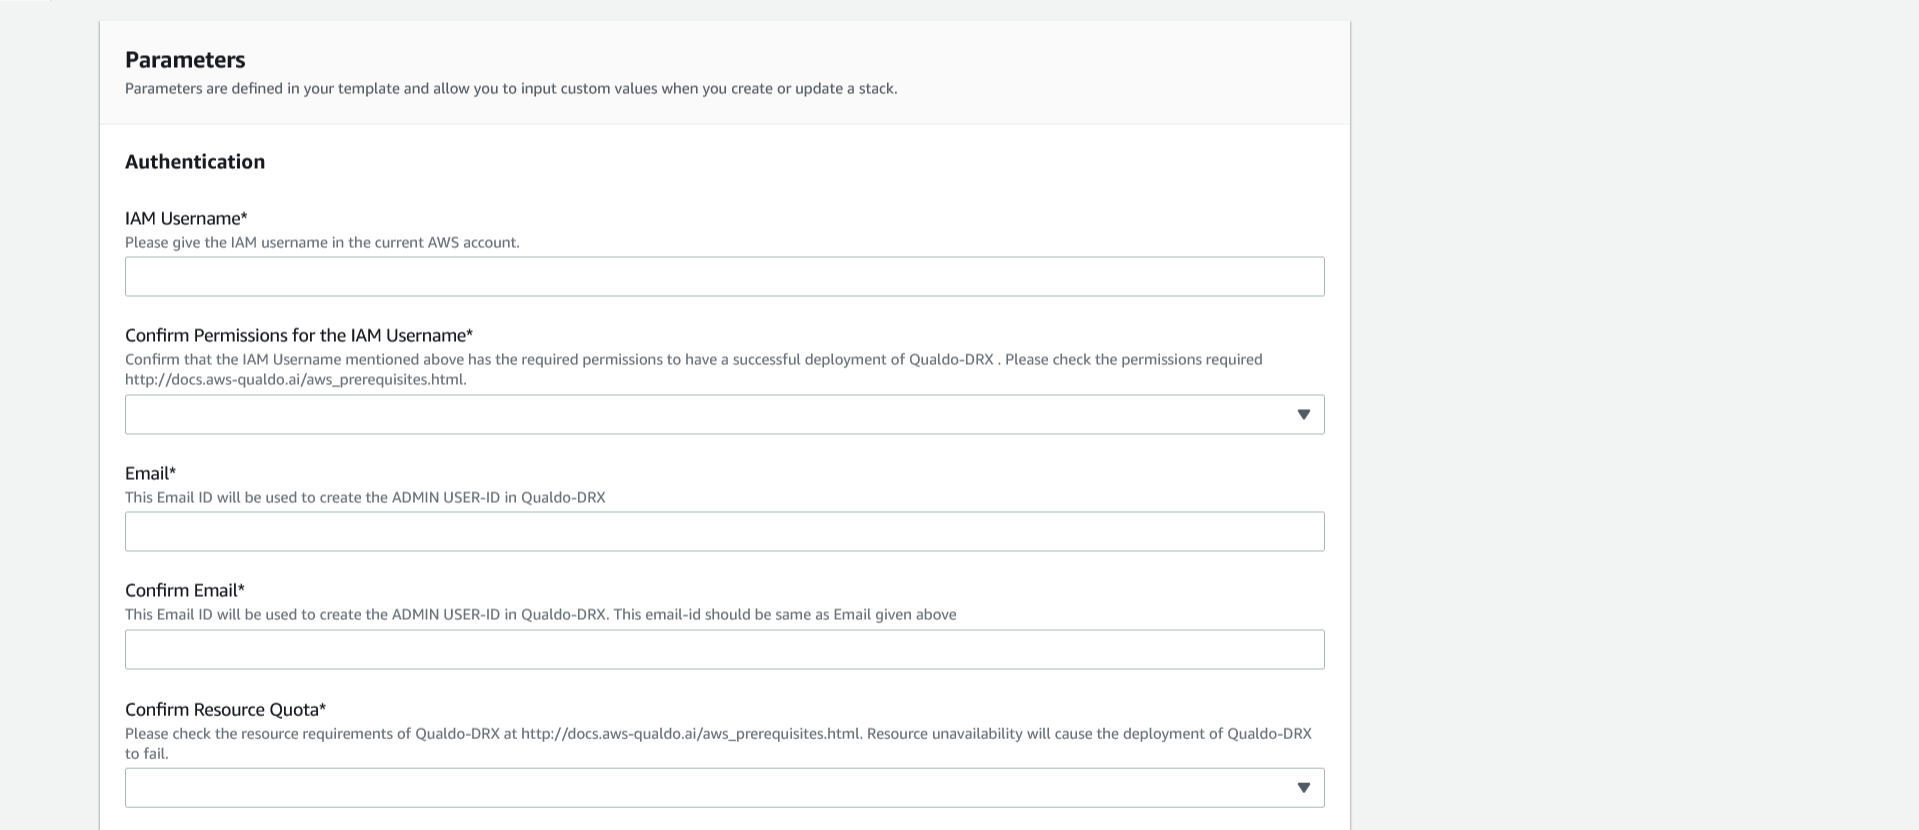
- IAM Username*
-
Provide your AWS IAM username here. This user will be deploying Qualdo-DRX. You can find the username in the navigation bar as shown below.
-
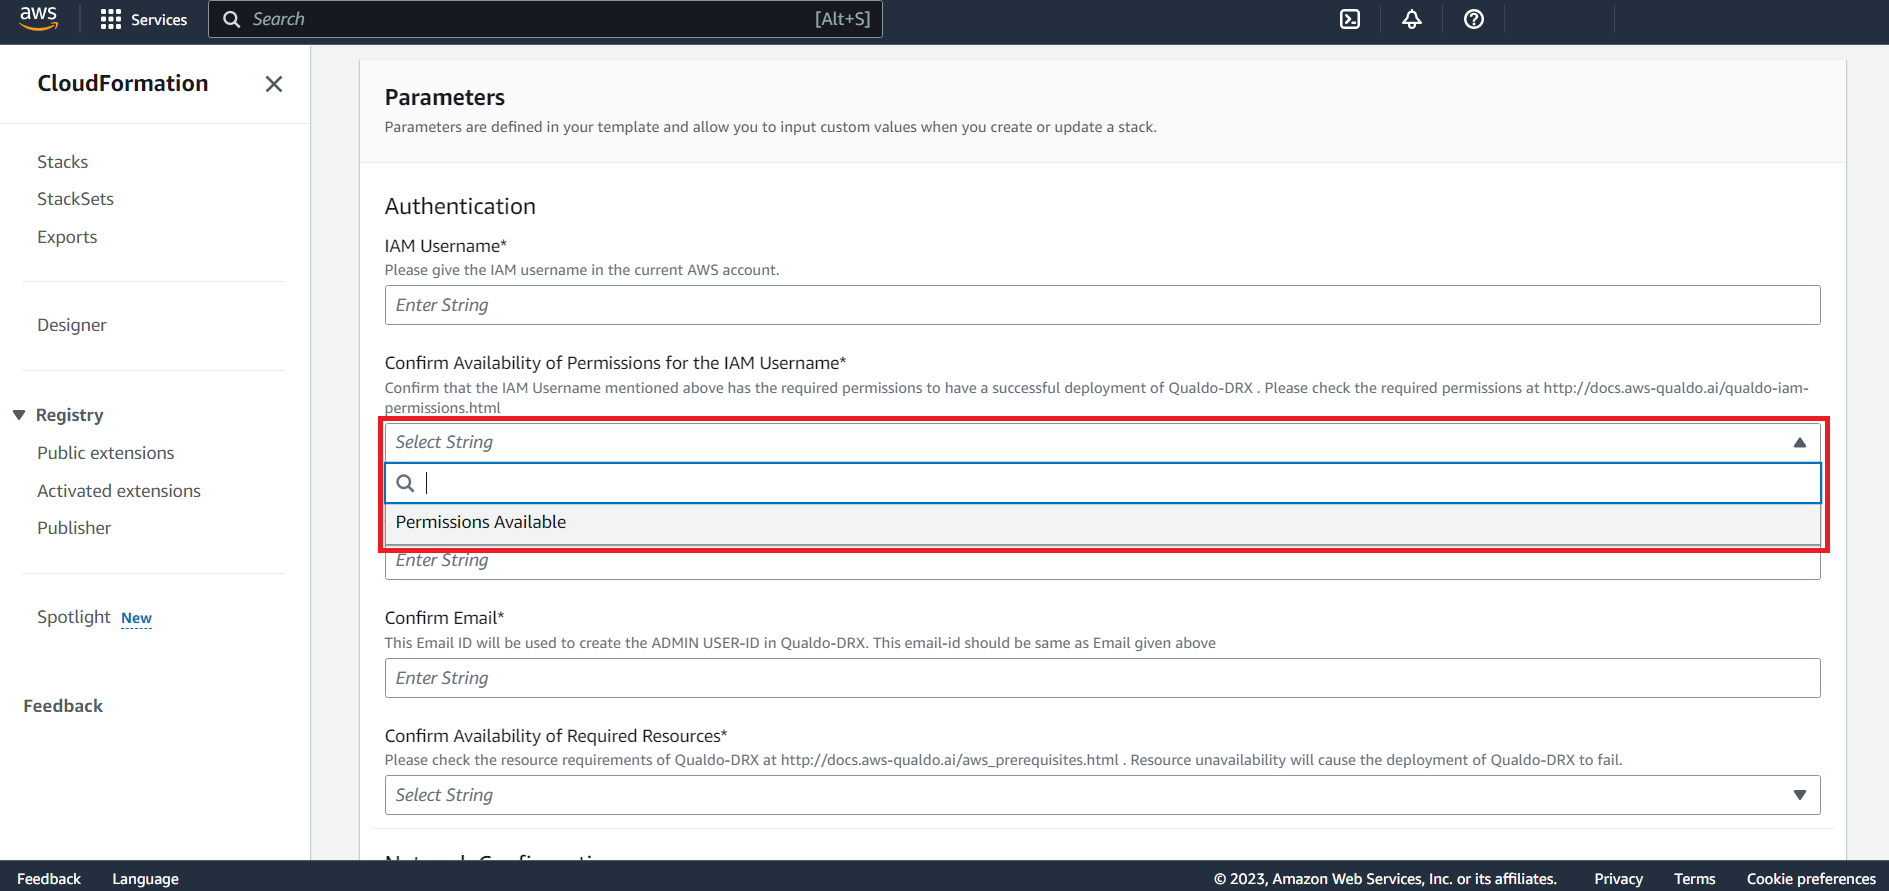
- Confirm Permissions for the IAM Username*
-
Please check the required permissions at
https://docs.aws-qualdo.ai/qualdo-iam-permissions.html
You must confirm that the IAM Username mentioned above has the required permissions to ensure a successful deployment of Qualdo-DRX.
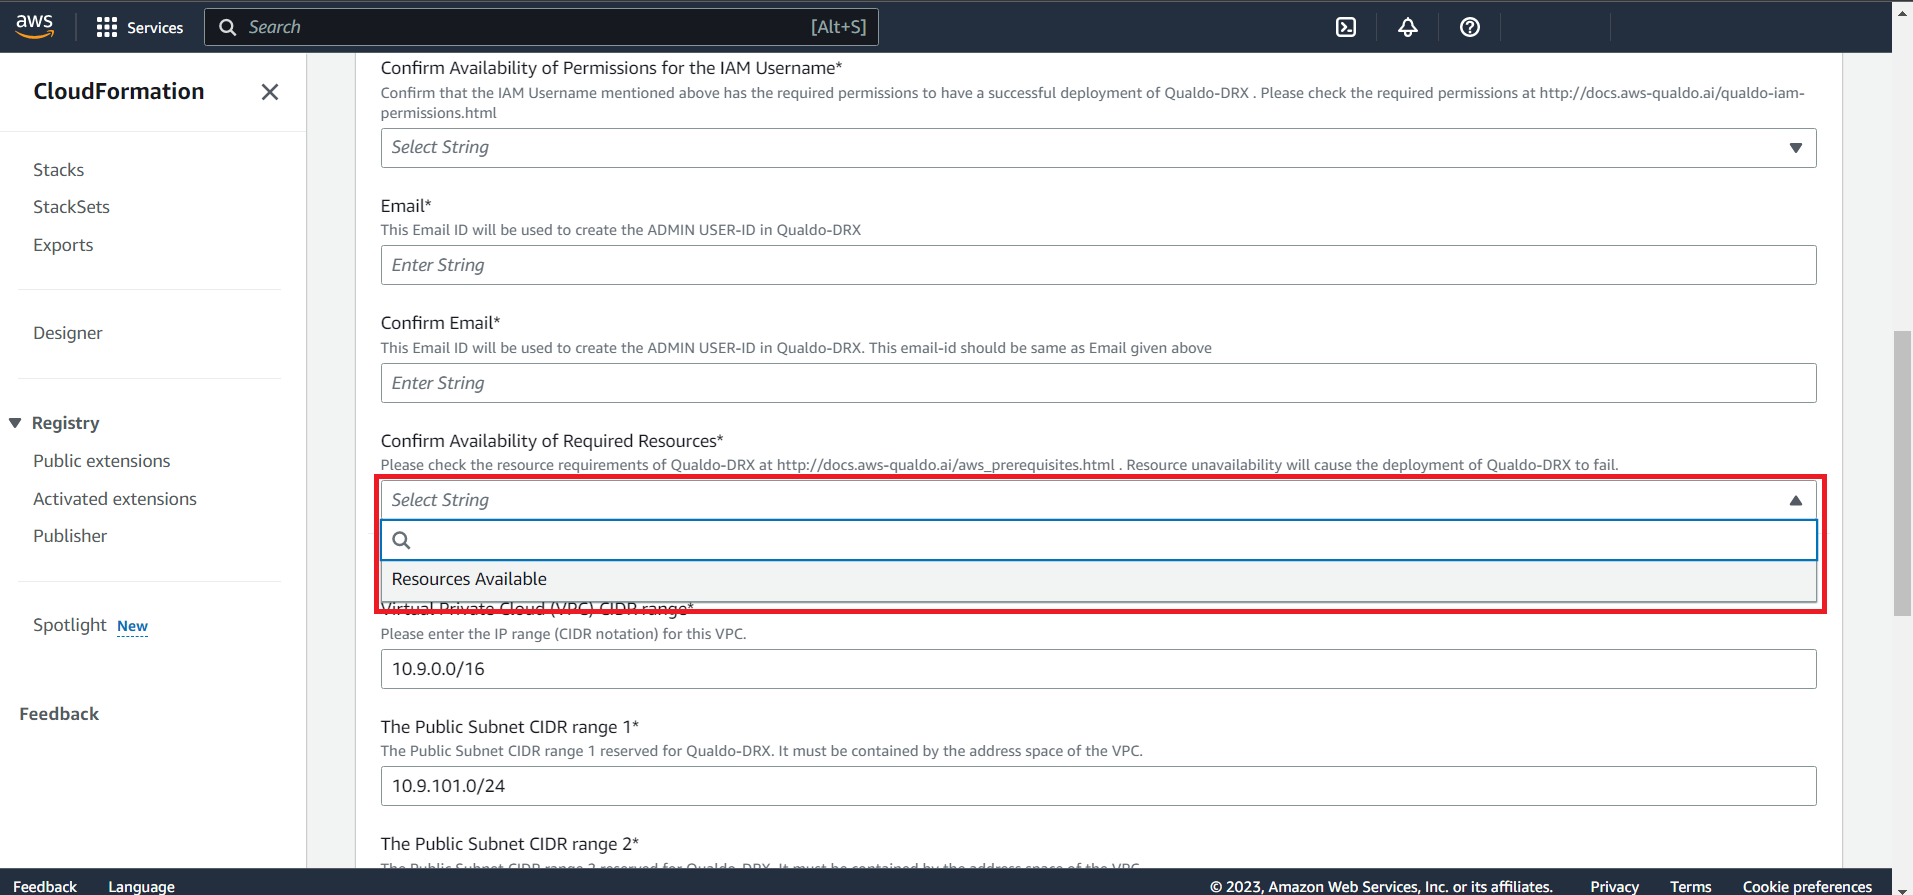
Click on "Permissions Available", from the dropdown, to confirm the availability of the required IAM Permissions to proceed further.
-
- Email*
-
This email-id will be used to create the ADMIN for the Qualdo-DRX. Upon the successful deployment of Qualdo-DRX, an email will be sent to the Admin with the details of the access information and the credentials. The Admin will have administrative control over Qualdo-DRX and will be able to add and remove users in Qualdo-DRX.
Note
Please ensure that you specify the correct email address.
-
- Confirm Email*
-
This Email ID will be used to create the ADMIN in Qualdo-DRX. This email-id should be the same as the email-id given above in the “Email” section.
-
- Confirm Resource Quota*
-
Please check the resource requirements of Qualdo-DRX at https://docs.aws-qualdo.ai/aws_prerequisites.html. Resource unavailability will cause the deployment of Qualdo-DRX to fail.
Click on "Resources Available", from the dropdown, to confirm the availability of the required resources in the chosen region to proceed further.
Network Configurations
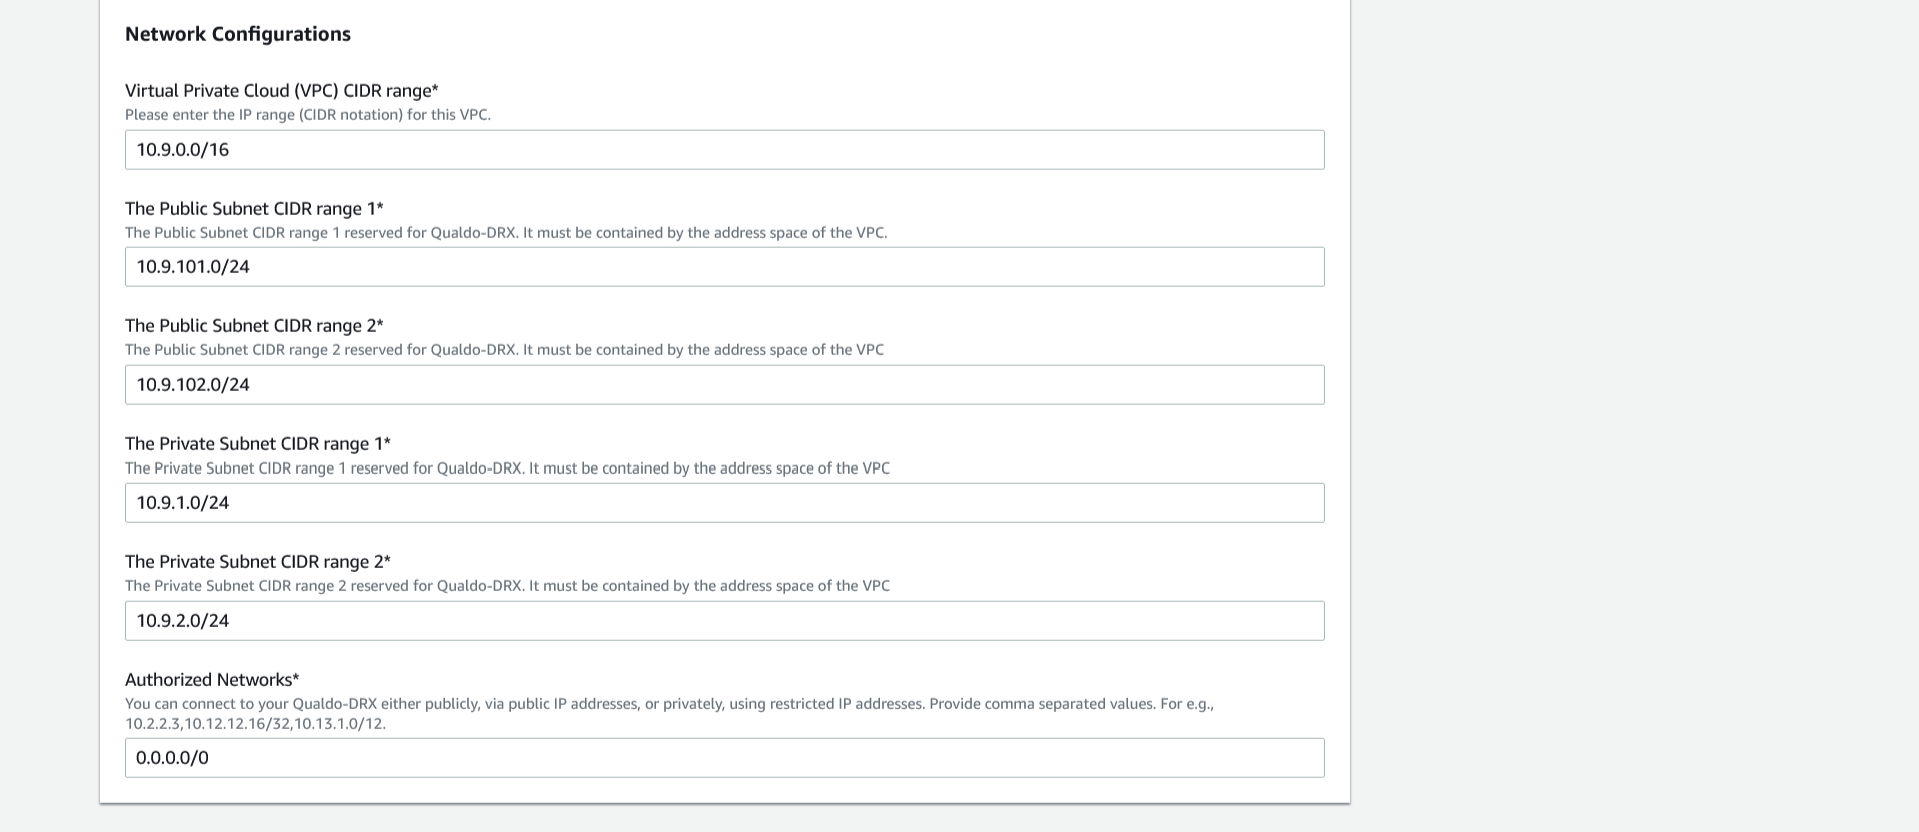
This section is completely optional. You can safely choose to skip making any changes here and the default values will be used for the deployment of Qualdo-DRX.-
- Virtual Private Cloud (VPC) CIDR range*
-
This is an optional field. The default value is 10.9.0.0/16. You can choose to specify the VPC for Qualdo-DRX. Please enter the IP range (CIDR notation) for this VPC.
-
- The Public Subnet CIDR range 1*
-
This is an optional field. The default value is 10.9.101.0/24. You can choose to specify the Public Subnet range 1, in CIDR notation, that will be used for Qualdo-DRX. It must be contained by the address space of the VPC specified above.
-
- The Public Subnet CIDR range 2*
-
This is an optional field. The default value is 10.9.102.0/24. You can choose to specify the Public Subnet range 2, in CIDR notation, that will be used for Qualdo-DRX. It must be contained by the address space of the VPC specified above.
-
- The Private Subnet CIDR range 1*
-
This is an optional field. The default value is 10.9.1.0/24 You can choose to specify the Private Subnet range 1, in CIDR notation, that will be used for Qualdo-DRX. It must be contained by the address space of the VPC specified above.
-
- The Private Subnet CIDR range 2*
-
This is an optional field. The default value is 10.9.2.0/24. You can choose to specify the Private Subnet range 2, in CIDR notation, that will be used for Qualdo-DRX. It must be contained by the address space of the VPC specified above.
-
- Authorized Networks*
-
This is an optional field. You can connect to your Qualdo-DRX either publicly, via all public IP addresses, or privately, using restricted IP addresses. Provide comma separated values. For e.g., 3.227.182.16/32,3.227.183.0/12. The default value is 0.0.0.0/0 with which you can connect to Qualdo-DRX via all public IP addresses.
Step 2 - Review Qualdo-DRX:
Check I acknowledge that AWS CloudFormation might create IAM resources with custom names. under Capabilities .

Click Create Stack at the bottom of the screen.
Step 3 - Stack Creation Progress:
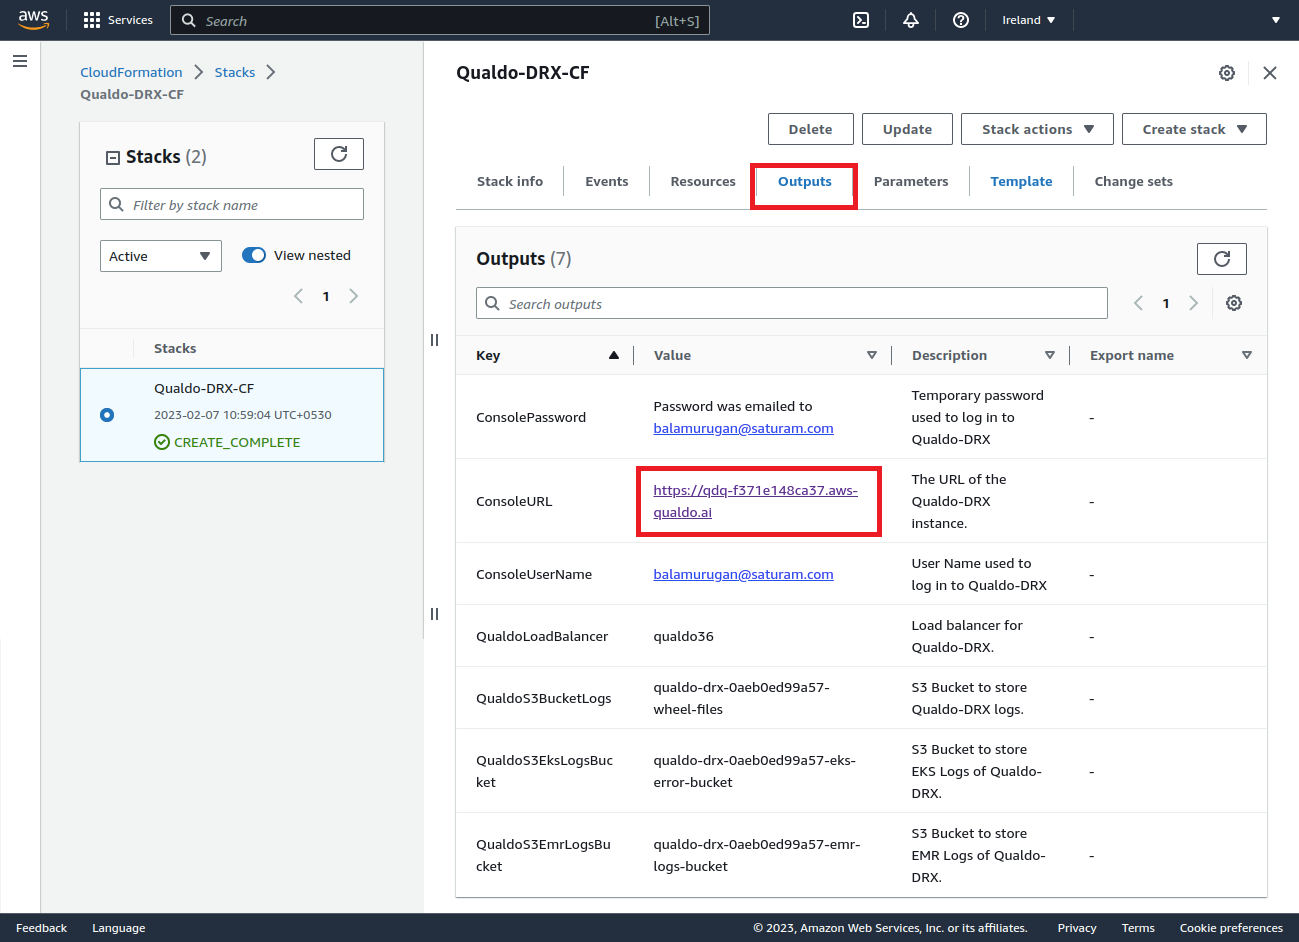
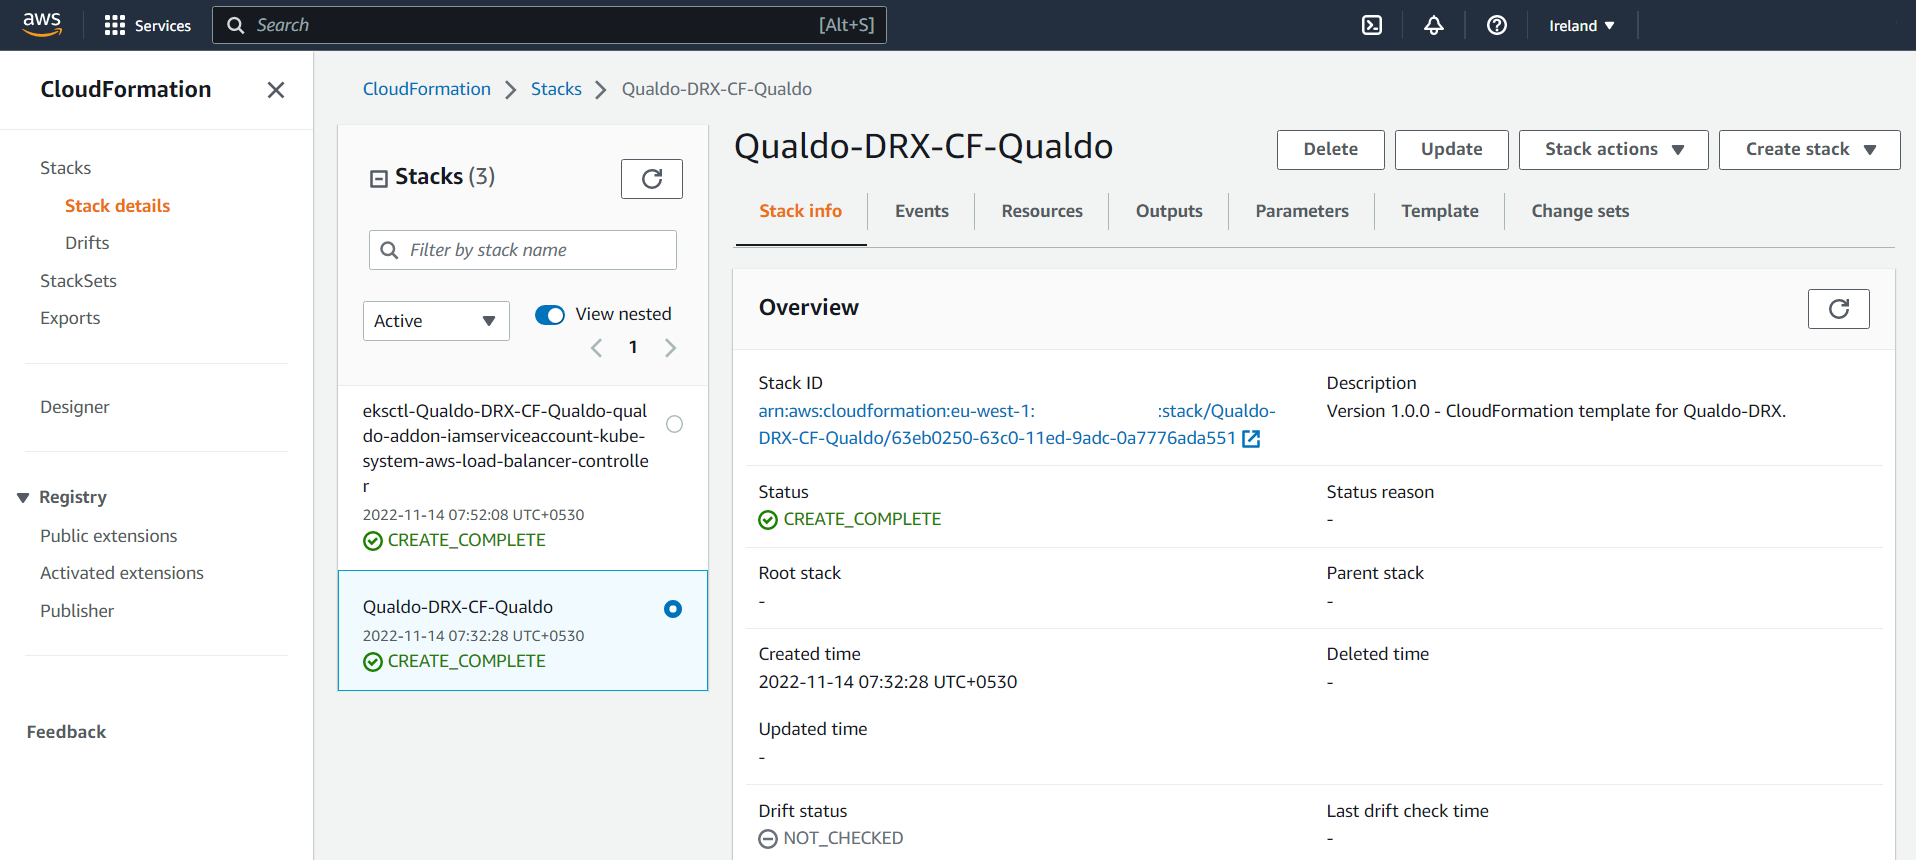
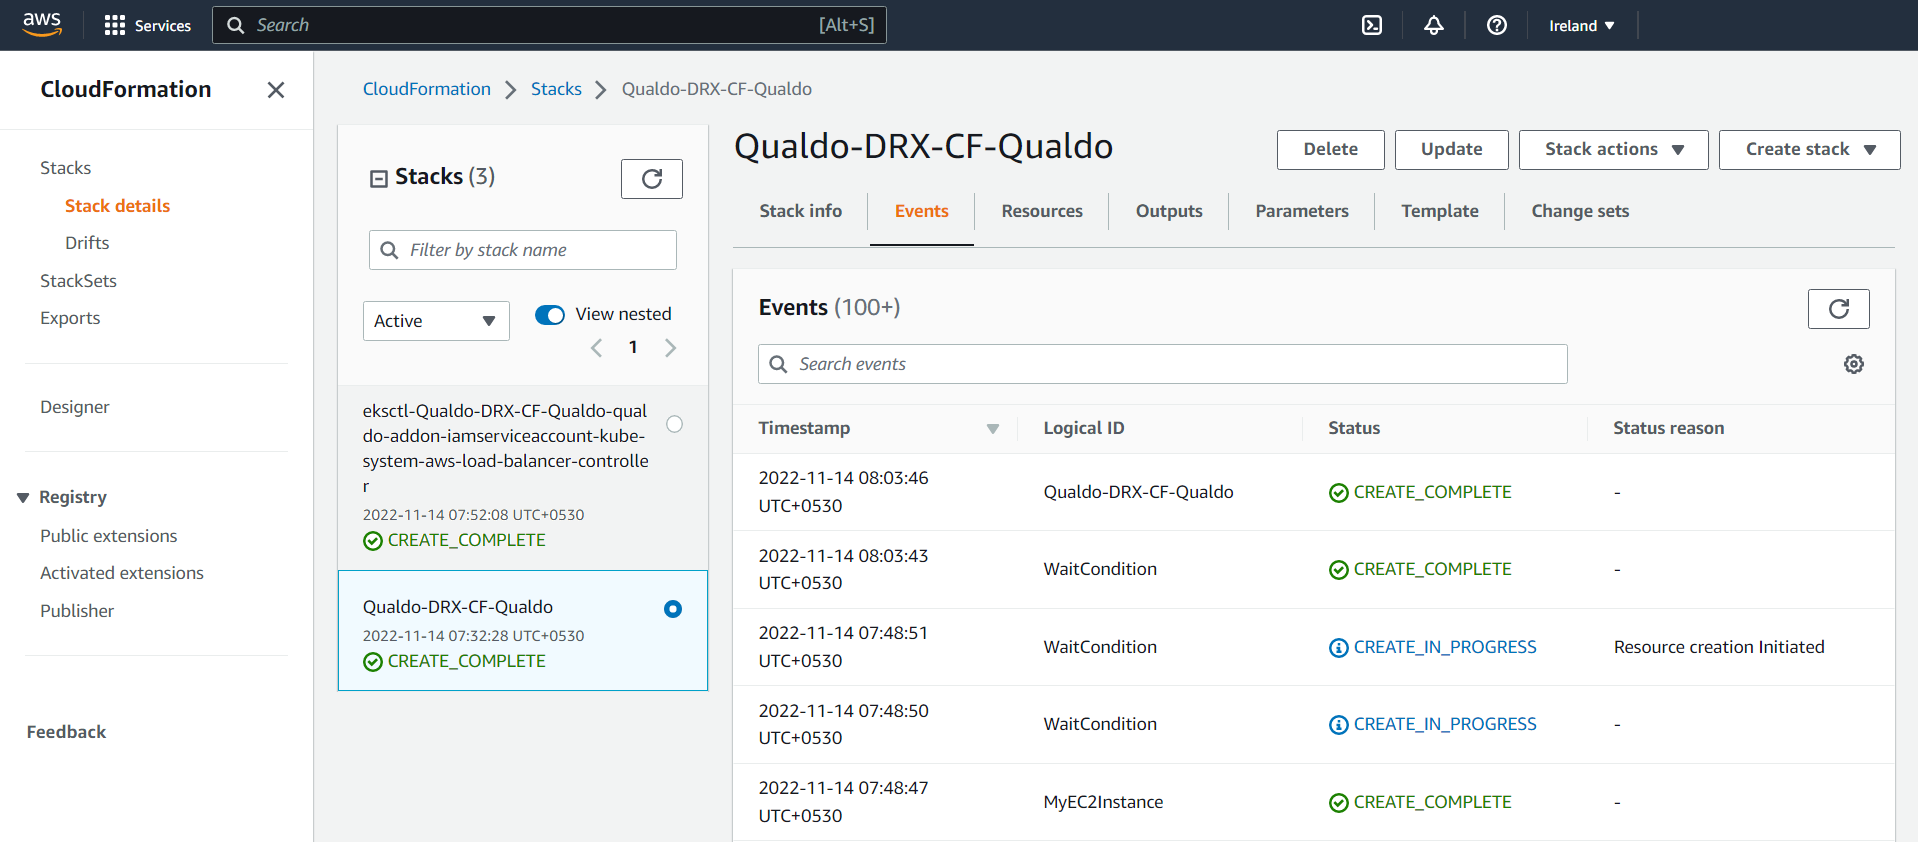
The stack you just created, QUALDO-DRX-CF will have a status of CREATE_IN_PROGRESS . Wait for this to change to CREATE_COMPLETE .
When finished the screen will look as shown below:
If the stack creations fails then check the Events Tab for details on the failure. Please contact helpdesk@qualdo.ai for further assistance.
Step 4 - Console Access:
Once the stack creation completes then check the Output tab. The Output tab will have the information on the URL, Username, Password, S3 buckets and Loadbalancer name for Qualdo-DRX.
Note
You will receive a welcome email in the specified Email address. This will have information about the URL for Qualdo-DRX and the password.
